Most dog owners know one reason boots fall off. But there are actually three big reasons, and you need to know all of them!
Here’s what makes boots slip off:
• Wrong paw width – Most people measure how long the paw is. But it’s really the width that stops the boot from spinning and sliding around.
• Strap in the wrong spot – Moving the strap just one inch up or down can make a huge difference! It can go from super secure to totally useless.
• Material stretches out – That perfect fit when you’re trying boots on in your living room? It changes fast once your dog starts moving and their body heat warms up the material.
Now here’s something a lot of folks don’t think about: your dog’s breed really matters! Picture a little Yorkie or Italian Greyhound with those skinny paws. They need boots with straps that can pull really tight without leaving gaps. But then think about a French Bulldog with those chunky paws. They need boots that don’t open up at the sides when their paw pushes down. Two dogs might weigh the same, but they need totally different boots!
Here’s the thing about sizing up (and this surprises people): making the boot bigger actually makes things worse! When the boot is too big, your dog’s paw slides around inside. All that sliding loosens the straps super fast. The strap might feel tight around the ankle, but if the paw is swimming around in the front part, you’re going to lose that boot every ten steps. I’ve seen it happen over and over at the dog park.
Step 1: Measure Paw Width, Not Just Length
Put your dog’s paw on a piece of paper while they’re standing up. This is really important: don’t lift their paw, don’t hold it in the air. They need to be standing with all their weight on that paw.
Mark the widest spot across the pads. Use millimeters instead of inches. Why? Because the tiny difference between 38mm and 40mm is what decides if that boot stays on or falls off after one block.
Small dogs have a weird width-to-length thing going on. Imagine a Chihuahua whose paw is 40mm long but only 35mm wide. Now picture a Pomeranian that weighs about the same but has a paw that’s 38mm by 38mm. Those dogs need completely different boot shapes, even though they’re almost the same size!
Here’s something nobody tells you: measure again after your dog has been walking around or at the end of the day. Paws swell up a little bit when dogs are active and warm. If you measure in the morning and buy boots that fit then, they’ll feel loose later when you actually need them to work.
Step 2: Check the Strap Placement Sweet Spot
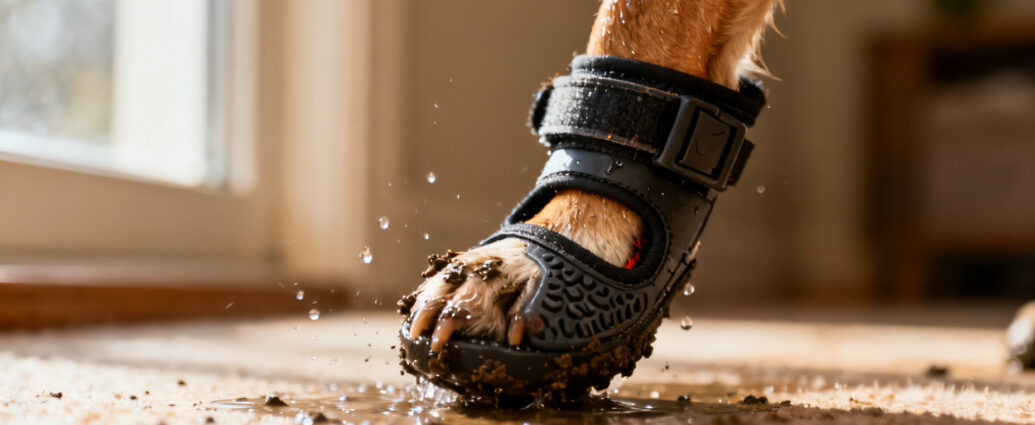
The strap needs to sit just above something called the stopper pad. That’s the small pad on the back of your dog’s leg, partway up the ankle. Don’t put it at the skinniest part of the ankle, or it’ll slide down with every single step.
Different dog shapes need different strap spots. Think about Dachshunds and Corgis with their short little legs. They need flatter straps that don’t get in the way when they walk. But taller dogs like Miniature Pinschers can handle wider straps that sit higher up without bothering them.
Try the two-finger test for tightness. You should be able to squeeze one finger under the strap when it’s fastened. Not two fingers. If two fingers fit easily, that strap will get loose during your walk. Also, grab the boot gently and try to twist it. If it spins on the paw, it’s not tight enough, even if it feels snug.
Step 3: Master the Wrap-and-Tuck Technique for Velcro Straps
Wrapping straight across doesn’t work. It just doesn’t create the right kind of pressure.
Wrap the strap at a tiny upward angle – toward the leg, not straight across. This creates pressure that stops the boot from sliding down, which is how most boots come off. You don’t need a big dramatic angle. Picture wrapping at about 15 degrees upward instead of totally flat.
Fold the extra strap length back on itself. Don’t leave it hanging loose! Loose strap ends get caught on carpet, grass, and bushes. Every time it catches on something, the velcro gets a little bit looser. When you tuck it back, everything stays tight and your dog won’t step on their own straps.
Super tiny dogs need extra help. Imagine a Teacup Yorkie that weighs less than 4 pounds. These little guys often need boots with two straps because one strap can’t spread the pressure evenly on such a skinny ankle. Two straps stop the boot from spinning and make it less likely to pinch.
Step 4: The Pre-Walk Break-In (Yes, It’s Necessary)
Let your dog wear the boots inside for five to ten minutes before the first outdoor walk. You can’t skip this!
The boot material needs to shape itself to your dog’s exact paw. Even more important, you need to watch how they walk to see if something’s wrong. It’s way easier to fix problems inside than when you’re outside dealing with squirrels and other distractions.
Watch for these warning signs:
• High-stepping – The boot is too tight or too heavy for their legs
• Paw shaking – A strap is pinching somewhere
• Sitting down and refusing to move – The boot is hitting that stopper pad with every step
Make all your strap adjustments now, not after you go outside and the boots warm up from body heat. Warm materials stretch out. What feels perfect in your heated house might be kind of loose ten minutes into a winter walk.
Step 5: The Walk Test That Most Owners Skip
Stop after ten minutes and check those straps. Do this every single walk for at least the first week.
When your dog first starts moving, things settle and shift. Even perfectly fitted boots can get loose. Your dog’s walking style, the ground texture, temperature changes – all of it changes how the boot sits on the paw. That first ten-minute check catches problems before the boot actually falls off. Trust me, it’s way better than chasing a boot down the sidewalk!
Test on the surfaces you’ll actually use. Boots that stay on perfectly on sidewalks might slip on grass or gravel because the traction is different. If you mostly walk on trails, test them there before you head out on a long hike.
Try to twist the boot on the paw after walking. If you can spin it more than 45 degrees, the fit is too loose. You need a smaller size or need to adjust the strap differently. Just tightening it again only fixes the problem for a few minutes. Getting the right fit actually solves it.
Step 6: When to Add Grip Aids (And Which Ones Work)
A thin layer of paw balm or musher’s wax inside the boot creates a slightly sticky surface. Picture a thin film, not a thick glob. This stops the paw from sliding around inside the boot without making it hard to take off or creating a mess.
Self-adhesive vet wrap works as a last resort for dogs with really tapered legs. Imagine a Miniature Pinscher with an ankle that’s way skinnier than their paw. There’s a gap the strap just can’t close. One layer of vet wrap around the ankle before you put the boots on fills that gap. But take it off after each wear so it doesn’t mess with their blood flow.
Boot socks can help dogs with very smooth leg fur. Italian Greyhounds are the perfect example of this problem – straps slide right down their hair no matter how tight you make them. Thin, grippy socks worn under the boots give the straps something to actually grip onto.
Step 7: Know When the Boot Design Is the Problem
Sometimes you just can’t fix the fit no matter what you do.
If you’re tightening straps so much they’re leaving dents in the fur, the boot design is wrong. If boots fall off in five minutes even after all these tricks, the boot design is wrong. If your dog walks stiff and weird, the boot design is wrong.
Yorkies and other dogs with narrow paws often do way better with boots that have a sock-like top part and one wide velcro strap. The sock part stays in place because of friction, and the strap keeps the whole thing from sliding down. Stockier dogs like French Bulldogs need boots with a wider front area and two straps – one strap won’t spread the pressure evenly across their thick ankles.
The price difference really matters with boots. Picture spending seventy-five dollars on really good boots versus twenty dollars on cheap ones. The expensive ones usually use materials that don’t stretch as much and have better ankle support. That directly affects whether they stay on when your dog is running around, not just standing in your kitchen looking confused.
Quick Troubleshooting Guide
Boot falls off one specific paw? Check if your dog’s paws are different sizes. Small dogs often have paws that are slightly different, and that quarter-inch difference is enough to cause problems. You might need to mix sizes or add extra grip stuff to just that one paw.
Boots stay on for walks but fall off during play? You need a boot with a higher ankle part or a toggle-lock system instead of just velcro. When dogs play, they make quick turns and side-to-side movements that velcro alone can’t handle.
Boots keep slipping when it’s wet? You need boots with taller cuffs that go higher up the leg. Or spray waterproofing stuff on the inside to reduce moisture-related sliding. Water makes things slippery between the paw and boot, and regular-height boots can’t handle that without extra grip or more coverage.