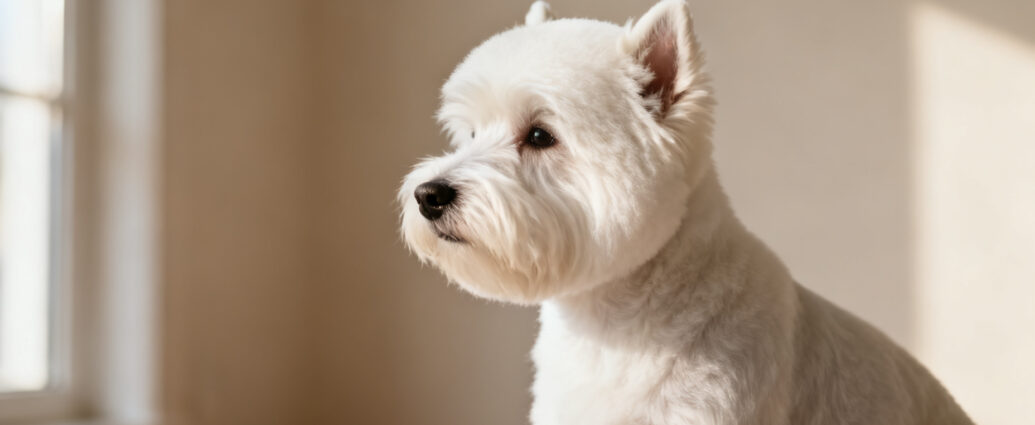
What Makes Westie Grooming Different (And Why It Matters)
Westies don’t have hair. They have a full-blown engineering project hiding under that white exterior.
Here’s the thing most people miss: that wiry coat is actually a double-layer system doing two completely different jobs at once. The outer layer – tough, coarse guard hairs – acts like a weatherproof shell, blocking wind and shedding rain. Beneath it sits a dense, pillowy undercoat whose only purpose is trapping warmth. You absolutely cannot just drag a brush across the surface and call it a day. The texture of that coat dictates everything: which tools belong in your hand, how frequently you’re grooming, and whether you’re physically pulling dead hair out by the root or buzzing through it with clippers.
And that’s exactly where you slam into the biggest fork in the road: hand-stripping or clipping.
| Hand-Stripping | Clipping | |
|---|---|---|
| What it means | Pulling out dead guard hairs by the root | Cutting the hair with electric clippers |
| Coat texture | Stays wiry and rough | Gets softer over time |
| Color | Keeps that bright white look | Can fade to cream or dull gray |
| Time | 2-3 hours every 8-12 weeks | Monthly grooms, about 1-2 hours |
| Cost (professional) | Usually more expensive | Roughly $65-85 per session |
Neither choice is wrong! They just deliver wildly different results and demand different commitments of your time and patience.
Here’s the thing: Plan on spending 15-20 minutes every week just on basic brushing. If you hand-strip, your first few full sessions might take even longer than 3 hours. If you clip, you’re looking at monthly trips to the groomer or doing it yourself at home.
The “Westie look” is shockingly specific – far more architectural than most people realize. Those longer, softer hairs cascading down the legs – called furnishings – create those adorable, sturdy-looking “trousers.” The head? Round as a globe, with small ears pitched forward like they’re permanently eavesdropping. The body coat stays cropped and tidy. These details aren’t cosmetic fluff. They’re what separates a proper Westie silhouette from just some random white dog trotting down the sidewalk.
Essential Tools for Home Westie Grooming
You need the right tools. Not the cutest ones. Not the ones that match your bathroom. The ones that actually do the job.
Here’s your shopping list:
- Slicker brush – Make sure the pins are long enough to penetrate through both coat layers without raking the skin raw underneath.
- Metal comb – Get one with both wide and narrow teeth. Cheap ones bend under pressure and skip right over tangles, so don’t throw your money away on bargain-bin versions.
- Stripping knives – These come in fine, medium, and coarse. Fine handles detail work, medium tackles most of the body. But honestly? Plenty of owners get terrific results using nothing but their thumb and pointer finger. It takes longer, sure, but it’s gentler on the dog and you won’t end up with expensive specialty tools collecting dust in a drawer eleven months out of twelve.
- Clippers (if you’re clipping) – Skip the $30 pet store kit that overheats in twelve minutes and sounds like a lawnmower. Invest in a decent pair. Use a #7F or #5F blade for the body and a #10 blade for ears and sanitary areas. Keep separate blades for different zones. The one you use under the tail should absolutely NOT be the one touching the face. That’s not a grooming tip – that’s basic hygiene.
- Thinning shears – For blending where stripped or clipped areas meet the longer leg hair.
- Straight shears – For trimming leg furnishings and sculpting the face.
- Nail grinder or clippers – Whichever your dog tolerates without turning into a drama queen.
- Ear powder – If you’re plucking ear hair.
- Grooming surface – You don’t need a professional hydraulic table. A rubber mat thrown on top of your washing machine works beautifully. A folding table with a non-slip surface is perfectly fine too. You just need something stable at a height that won’t leave your back screaming at you by the end.
The Weekly Maintenance Routine (15-20 Minutes)
This is the unglamorous work that prevents the catastrophic work later.
Line brushing means you part the coat into sections and brush from the skin all the way out to the tip, then shift to the next section. Don’t just skim the surface! If you do, you’ll completely miss the tangles silently knotting themselves underneath. Pay extra attention to:
- Armpits
- Behind the ears
- The “trousers” (leg furnishings), where hair grinds against itself with every single step
The beard and face demand attention every single day – no exceptions. Wipe them down after meals and water. Westies are spectacularly messy eaters, and that white beard hides nothing. Stains and yeast colonize damp facial hair with alarming speed. Trim around the eyes when needed so your dog can actually see where it’s going, but don’t hack away too aggressively – you want enough hair to preserve that bright, mischievous Westie expression.
Quick tip from experience: Imagine a Westie owner who skips face wipes for just one week – picture that pristine white beard slowly turning pinkish-brown from trapped food particles and moisture, staining deeper each day. It’s exponentially harder to reverse than to prevent. A ten-second daily wipe with a damp cloth saves you an hour of frustrated scrubbing later.
Nails: Every 2-3 weeks.
Ears: Check them weekly, but only clean them when they genuinely need it. Overcleaning actually strips natural oils and causes irritation – the opposite of what you’re going for.
Teeth: Brushing every day is the gold standard, but let’s be honest with ourselves – just do your best and don’t spiral into guilt.
Sanitary trim: Keep the area under the tail tidy between full grooms. A quick snip with scissors every couple of weeks prevents mess and makes life measurably better for everyone involved – dog included.
Hand-Stripping Your Westie: The Full Process
You’ll know the coat is ready when the hair practically wants to leave. Try this: grab a small clump of hairs and tug gently. If they slide right out without resistance or flinching, it’s go time. You might also notice the coat looking dull, slightly blown-out, or weirdly fluffy instead of sleek and tight against the body. This tipping point usually arrives 8-12 weeks after the last strip.
Work in sections. Here’s a solid order:
- Neck and shoulders
- Back and sides
- Head and legs (save these for last – they’re the fiddliest)
Your very first attempt will probably consume 3-4 hours. Maybe longer. That’s completely normal – don’t panic. You’re learning where the coat releases willingly and where it clings, how much force is enough versus too much, and how to position your hand so your fingers don’t cramp into claws halfway through.
The stripping motion: Take small sections at a time. Grip firmly with your thumb and pointer finger (or hold a stripping knife like a comb, never like a knife – you’re not whittling). Pull in the direction the hair grows. You’re removing dead hair, not ripping out living roots. It genuinely doesn’t hurt your dog, even though they might get profoundly bored and start wiggling like they’ve got somewhere better to be. Taking breaks is completely fine. This isn’t a sprint.
Blending and shaping come last. Use thinning shears to create smooth, invisible transitions between the stripped body coat and the longer leg furnishings. Shape the leg hair so it looks full and structured – not shaggy, not wild. The goal is “well-groomed terrier with purpose,” not “exploded cotton ball rolling down the hallway.”
Clipper Grooming: The Faster Alternative
Let’s be honest with ourselves: clipping is easier. It’s faster, it demands less specialized skill, and your dog will almost certainly tolerate it better than sitting still for hours of hand-stripping.
The trade-off? Texture and color. Over successive clippings, the coat gradually softens – that distinctive rough, wiry feel slowly dissolves into something cottony. The brilliant white might drift toward cream or take on a grayish cast. For families who aren’t entering conformation rings, this is usually a perfectly acceptable trade. Your dog doesn’t care about coat texture. Your dog cares about treats and squirrels.
Here’s how to clip a Westie:
- Start at the base of the skull and work down the neck and back toward the tail.
- Go with the direction of hair growth for a longer, more natural cut, or against it for a shorter, tighter finish.
- Keep your blade flat against the body so you don’t carve lines or leave gouges that scream “home haircut.”
- Overlap your passes slightly – think of it like mowing a lawn.
- The body should end up short and tidy – about half an inch or less, depending on your blade choice.
Scissoring the head and furnishings is where the breed silhouette truly comes alive. Leave the hair longer on top of the skull and trim shorter on the sides to sculpt that signature rounded head shape. Clip the ears so they look small, crisp, and forward-pointing – almost alert. Shape the leg hair so it’s fuller at the bottom and blends seamlessly upward into the shorter body coat.
Want to keep some texture even while clipping? Leave the coat a touch longer and run a carding tool (a type of stripping comb) through it between grooms. It won’t preserve the full wiry jacket, but it helps your Westie look distinctly like a Westie rather than a generic fluffy white dog fresh from the clippers.
The Head, Face, and Feet: Detail Work That Defines the Look
This is the make-or-break zone. This is where a Westie either looks like a Westie or just looks like a plain white dog with big dreams and no stylist.
The head should be rounded – people call it the “chrysanthemum” shape when viewed straight-on. Think of a soft globe, not a motorcycle helmet. Leave hair longer on top of the skull, keep it shorter on the sides, and blend everything so the transitions look effortless and natural. Use thinning shears to remove bulk without creating harsh, choppy lines that betray your handiwork.
Ears get clipped short with a #10 or #15 blade. Trim the edges clean with scissors to maintain that small triangle shape perched forward on the head. If the ears look big, floppy, or tilted backward, the entire breed silhouette collapses – it throws everything off like a crooked picture frame in an otherwise perfect room.
Beard and eyebrows need enough length to broadcast expression – that’s an enormous part of the Westie’s irresistible charm – but not so much that they’re dragging through dinner or soaking up water like a sponge. Trim at a slight angle so hair doesn’t curtain down into the eyes. Your Westie should look alert and a little mischievous, like it’s plotting something fun. Not like it’s peeking through heavy drapes.
Feet and leg furnishings:
- Trim the hair between the paw pads flush with the pads themselves – this prevents matting and gives them dramatically better traction on slippery floors.
- From above, the foot should look round and compact, almost like a cat’s paw.
- Leg hair should be fullest at the bottom and gradually thin as it blends upward into the body coat.
- Use thinning shears to remove bulk and sculpt shape without leaving obvious scissor marks that scream “I did this in my kitchen.”
Bathing, Drying, and Common Grooming Problems
Bathe your Westie after stripping or clipping, not before. Here’s why: a squeaky-clean coat is slippery and nearly impossible to grip for stripping, and running clippers through dirty hair dulls your blades at twice the normal rate. Use a whitening shampoo if you’re battling stains, or choose a formula specifically designed not to soften the coat. Westies don’t need frequent baths between grooms – every 6-8 weeks is plenty unless they’ve rolled in something so foul you can smell them from across the yard.
Drying matters far more than you’d expect. Towel off the excess water first, then blow-dry while simultaneously brushing to lift the coat and prevent tangles from locking in while damp. Air-drying leaves the coat flat, shapeless, and messy – and it’s significantly harder to style afterward. If your Westie panics at the dryer, start with low speed and warm (never hot) air. Offer treats generously. Make it tolerable, then gradually make it boring. Never make it terrifying.
Dealing with mats:
- They love to form behind the ears, deep in the armpits, and between the back legs – essentially anywhere hair rubs against itself or stays damp for too long.
- Catch them early! You can tease them apart with detangling spray, a metal comb, and a healthy dose of patience.
- Always work from the outer edge of the mat inward. Never yank the whole thing at once.
- If a mat is tight and plastered against the skin, just cut it out and move on with your life. Your dog will forgive you. The coat grows back. Your relationship matters more than one small patch of fur.
Important health note: Westies are notoriously prone to skin allergies and yeast infections – it’s one of the breed’s well-known vulnerabilities. Watch for redness, foul smells, excessive scratching, or greasy, waxy patches. If you spot any of these signs, stop grooming immediately and visit your vet before doing anything else. Certain shampoos and grooming products actively aggravate sensitive skin, turning a minor flare-up into a full-blown crisis. Look for hypoallergenic or medicated options if your Westie has any history of skin trouble. Grooming a dog with active skin problems doesn’t help – it just spreads the irritation across a wider area and makes everything measurably worse.